You may also like:
- 【Explained】What Does a Car Air Filter Do? Your Guide to Engine Health
- 【Explained】How Long Does It Take a Car to Cool Down? (The 30-Minute to 3-Hour Guide)
- 【Explained】When Does the 2-Hour Car Seat Rule End for Babies?
- 【Explained】What Does an Air Filter Do in a Car? (Engine vs. Cabin Filter Explained)
- 【Explained】What Car Has the Best Air Conditioning for the Back Seat? (Full Guide)
To fix a car AC blowing hot air, start with simple checks: replace the cabin air filter if dirty, clean debris from the condenser, and check for blown fuses in your fuse box. If these easy fixes don’t work, use a DIY refrigerant recharge kit to add refrigerant through the low-pressure port, but if problems persist—especially with compressor issues or electrical faults—consult a professional mechanic[1].
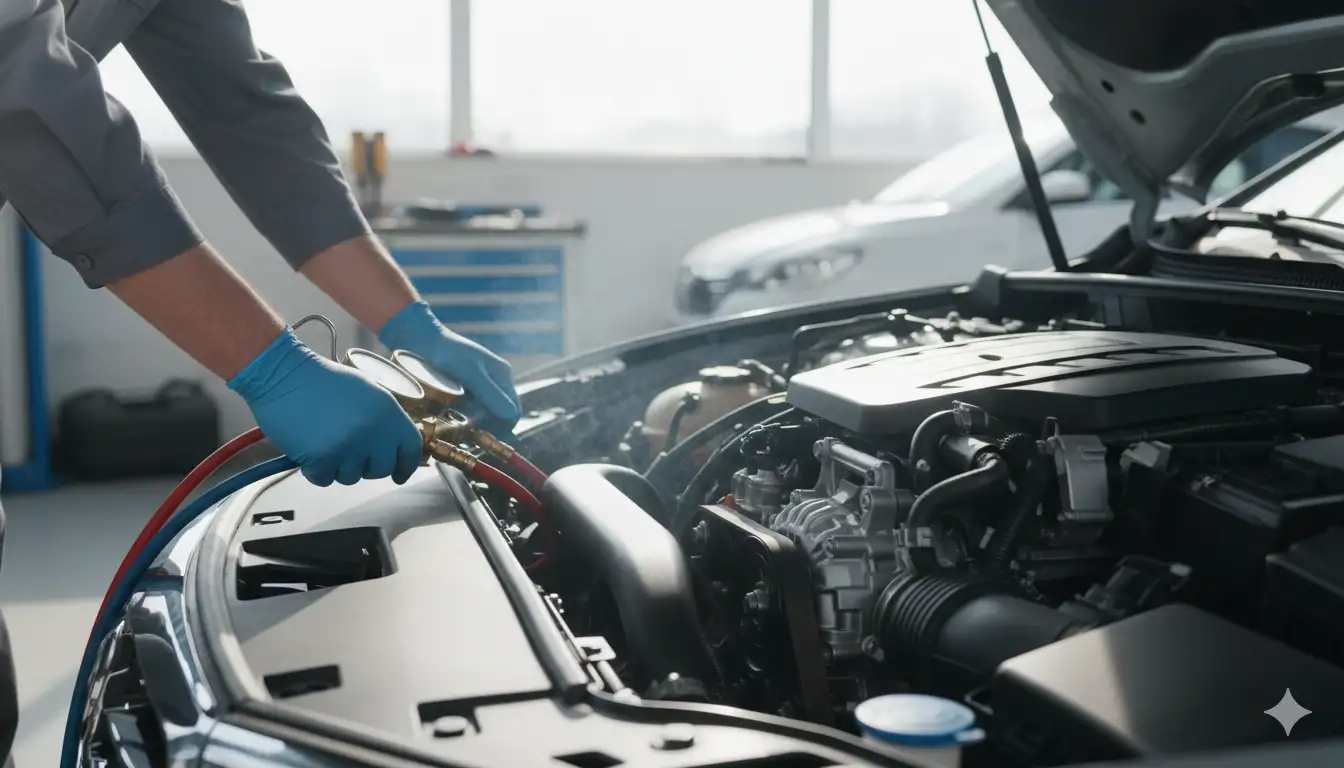
Easy Fixes for Car AC Blowing Hot Air
Before assuming expensive repairs are needed, several simple issues can cause your car’s AC to blow hot air. These basic troubleshooting steps take minimal time and tools, potentially saving hundreds of dollars in unnecessary professional repairs. According to automotive experts, up to 30% of AC problems stem from these easily fixable issues[2].
Check and Replace the Cabin Air Filter
The cabin air filter acts as your vehicle’s first line of defense against dust, pollen, and debris entering the AC system. A clogged filter restricts airflow by up to 60%, making your AC work harder while delivering less cooling[3]. Most drivers overlook this simple maintenance item, which typically costs only $15-30 to replace.
Dirty Cabin Air Filter Symptoms
Recognizing the signs of a clogged cabin filter helps prevent AC performance degradation. When the filter becomes saturated with contaminants, it creates a barrier that prevents proper air circulation through the evaporator coil.
Common symptoms include:
- Reduced airflow even at maximum fan settings
- Musty or unpleasant odors from vents
- Longer cooling times than normal
- Increased fan noise as the blower works harder
- Foggy windows due to poor dehumidification
- Visible debris in air vents
According to Autvex maintenance data, vehicles driven in dusty or urban environments need filter replacement every 12,000 miles, while highway driving may extend this to 15,000-20,000 miles[3].
Clogged Air Filter Replacement Steps
Replacing your cabin air filter takes about 10 minutes and requires no special tools. Most filters are located behind the glove box or under the dashboard on the passenger side.
Step-by-step replacement process:
- Locate the filter housing (check owner’s manual for exact location)
- Remove glove box by squeezing sides inward or removing stops
- Open filter door by releasing clips or screws
- Note airflow direction arrow on old filter
- Remove old filter carefully to avoid spilling debris
- Insert new filter matching the airflow arrow direction
- Reassemble components in reverse order
For luxury vehicles like the BMW 3 Series or Audi A4, cabin filters may include activated carbon layers that cost slightly more but provide superior odor control.
Clean the AC Condenser
The AC condenser, positioned in front of your radiator, releases heat from the refrigerant. When blocked by bugs, leaves, or road debris, it can’t dissipate heat effectively, causing your AC to blow warm air[4]. Regular cleaning maintains optimal heat transfer and prevents compressor strain.
Condenser Blockage Signs
A blocked condenser creates a cascade of problems throughout your AC system. Heat buildup increases system pressure, potentially triggering safety shutoffs or component damage.
Indicators of condenser blockage:
- AC works better at highway speeds than idle
- Engine temperature rises when AC is on
- Visible debris on condenser fins
- Refrigerant pressure readings exceed specifications
- Compressor cycles on and off frequently
Professional mechanics report that 40% of AC performance issues involve dirty or damaged condensers, making regular inspection crucial[4].
How to Clean Clogged AC Condenser
Cleaning your condenser requires gentle techniques to avoid bending the delicate aluminum fins. This 30-minute maintenance task can restore significant cooling capacity.
Condenser cleaning procedure:
- Safety first: Turn off engine and let cool for 30 minutes
- Access condenser: May require removing plastic covers or grille
- Inspect for damage: Look for bent fins or punctures
- Remove large debris: Use soft brush or compressed air
- Apply cleaner: Spray coil cleaner following product directions
- Rinse gently: Use garden hose with low pressure
- Straighten fins: Use fin comb for bent areas
- Allow to dry: Wait 15 minutes before starting engine
Professional tip: Clean from inside out to push debris away from the radiator. For detailed cooling system maintenance, review comprehensive AC system guides.
Check for Blown Fuse and Faulty Wiring
Electrical issues account for approximately 25% of AC failures, yet they’re often the simplest and cheapest to fix[2]. A single blown fuse costing $2 can completely disable your AC system.
AC System Electrical Problems
Modern vehicles use multiple fuses and relays to protect AC components. When one fails, the entire system may shut down as a safety measure.
Common electrical failure points:
- AC clutch fuse (typically 10-15 amp)
- Blower motor fuse (20-40 amp)
- Control module fuse (5-10 amp)
- AC relay (controls compressor engagement)
- Pressure switch connections
- Temperature sensor wiring
Your vehicle’s fuse box diagram, usually found in the owner’s manual or inside the fuse box cover, identifies each fuse’s location and rating. Replace blown fuses with identical amp ratings to prevent damage.
Loose Electrical Connection Issues
Vibration and corrosion create loose connections that cause intermittent AC operation. These problems often worsen in hot weather when electrical resistance increases.
Troubleshooting electrical connections:
- Visual inspection: Look for corroded or burnt terminals
- Wiggle test: Gently move connectors while AC runs
- Voltage testing: Use multimeter to verify power
- Clean connections: Use electrical contact cleaner
- Apply dielectric grease: Prevents future corrosion
- Secure loose wires: Use zip ties to prevent movement
According to Autvex diagnostic data, vehicles over five years old commonly develop connection issues at the compressor clutch connector, requiring only cleaning and tightening for restoration.
Intermediate DIY Car AC Repair Solutions
When basic fixes don’t resolve hot air issues, intermediate solutions address refrigerant-related problems. These repairs require specific tools and safety precautions but remain within capable DIY enthusiasts’ abilities.
Recharge Car AC at Home
Low refrigerant levels cause over 50% of AC cooling problems, making recharging a valuable DIY skill[5]. Modern recharge kits simplify this process, though proper technique ensures safety and effectiveness.
How to Check Car AC Gas Levels
Before adding refrigerant, verify your system actually needs it. Overcharging causes as many problems as undercharging, potentially damaging the compressor.
Checking refrigerant levels:
- Start engine and set AC to maximum cooling
- Locate service ports: Low-pressure port is larger, usually on passenger side
- Connect gauge: Attach to low-pressure port only
- Read pressure: Compare to temperature chart on gauge
- Interpret results:
- Below 25 PSI: System needs refrigerant
- 25-45 PSI: Normal range (varies by ambient temperature)
- Above 45 PSI: Possible overcharge or other issues
Temperature-pressure correlation chart:
| Ambient Temp | Normal Low-Side PSI | Normal High-Side PSI |
|---|---|---|
| 70°F | 35-40 | 140-160 |
| 80°F | 40-50 | 175-210 |
| 90°F | 45-55 | 225-250 |
| 100°F | 50-60 | 250-270 |
AC Low Pressure Service Port Location
Finding the correct service port prevents costly mistakes. The low-pressure port typically has a blue or black cap marked “L” and uses a different size fitting than the high-pressure port.
Common low-pressure port locations:
- Near firewall on passenger side
- On accumulator/drier (cylindrical component)
- Along AC lines between firewall and compressor
- Near battery in some European vehicles
Never connect to the high-pressure port (marked “H” with red cap), as this can cause explosive refrigerant discharge. For specific locations on luxury models, consult manufacturer service guides.
Recharge procedure using DIY kit:
- Shake can thoroughly before use
- Thread hose onto can (don’t puncture yet)
- Connect to port with engine running, AC on max
- Begin charging: Squeeze trigger or turn valve
- Rock can between 12 and 3 o’clock positions
- Monitor gauge: Stop when in green zone
- Charge slowly: Takes 5-15 minutes per can
- Check vent temperature: Should drop 20-30°F
Professional shops charge $150-300 for this service, while DIY kits cost $30-50[5].
Refrigerant Leak Detection and Repair
Refrigerant leaks develop gradually, often taking months to impact cooling performance. EPA regulations prohibit knowingly releasing refrigerant, making leak repair both legal and environmental requirements[6].
Freon Leak Symptoms
Modern vehicles use R-134a or R-1234yf refrigerant (not Freon, though the term persists). Leak symptoms develop progressively as refrigerant levels drop.
Progressive leak indicators:
- Stage 1 (Minor leak): AC takes longer to cool
- Stage 2 (Moderate leak): Intermittent cooling, especially in traffic
- Stage 3 (Major leak): No cooling, compressor won’t engage
- Stage 4 (Complete loss): System contains air, requires evacuation
Physical evidence of leaks:
- Oil residue at connection points (refrigerant carries oil)
- UV dye traces under blacklight (if dye added)
- Hissing sounds from large leaks
- Frost formation at restriction points
Finding AC Refrigerant Leaks
Professional leak detection uses multiple methods, but DIY options exist for persistent car owners.
DIY leak detection methods:
- Visual inspection ($0):
- Check all visible connections
- Look for oily residue
- Inspect rubber hoses for cracks
- Soap solution ($5):
- Mix dish soap with water
- Spray on connections
- Watch for bubbles forming
- UV dye kit ($25-40):
- Add dye to system
- Run AC for 20 minutes
- Scan with UV light
- Green/yellow glow indicates leaks
- Electronic detector ($50-150):
- Most sensitive method
- Detects parts per million
- Audible/visual alerts
Common leak locations include:
- Schrader valves in service ports (30% of leaks)
- O-rings at connections (25%)
- Evaporator core (20%)
- Condenser damage (15%)
- Compressor shaft seal (10%)
Minor leaks at accessible connections can be repaired with new O-rings and proper torque. Major component leaks require professional replacement.
Identifying Bad AC Compressor Symptoms
The compressor serves as your AC system’s heart, circulating refrigerant through the system. When it fails, no amount of refrigerant will restore cooling. Replacement costs range from $1,300 to $2,500, making accurate diagnosis crucial[7].
Compressor Clutch Not Engaging
The electromagnetic clutch engages the compressor when cooling is needed. Clutch failure prevents compression even with a functioning compressor unit.
Clutch engagement test:
- Engine running, AC on maximum
- Observe clutch hub at compressor front
- Look for cycling: Should engage/disengage periodically
- Listen for click when engaging
- Check for spinning: Center plate should rotate with belt
Common clutch problems:
- No power to clutch coil (electrical issue)
- Excessive air gap (0.020-0.035″ normal)
- Burnt coil (infinite resistance when tested)
- Seized bearing (manual rotation impossible)
- Low refrigerant (safety switch prevents engagement)
Faulty Compressor Testing
Comprehensive compressor testing determines if replacement is necessary or if simpler repairs suffice.
Compressor diagnostic tests:
| Test Type | Method | Good Result | Bad Result |
|---|---|---|---|
| Electrical | Check clutch coil resistance | 2-5 ohms | 0 or infinite ohms |
| Mechanical | Hand rotate clutch | Smooth rotation | Seized or grinding |
| Pressure | Compare inlet/outlet | 150+ PSI difference | Minimal difference |
| Temperature | Feel inlet/outlet lines | Cold in, hot out | Similar temperatures |
| Noise | Listen while running | Smooth operation | Knocking, grinding |
Professional mechanics use manifold gauges to measure compression ratios accurately. DIY diagnosis relies more on observation and basic multimeter testing.
Replace AC Compressor Considerations
Compressor replacement represents the most expensive common AC repair. Understanding when replacement is necessary versus repairable helps make informed decisions.
Replacement indicators:
- Internal damage: Metal shavings in system
- Seized mechanism: Won’t turn manually
- Case cracks: Refrigerant leaks from housing
- Excessive noise: Internal bearing failure
- No compression: Confirmed by pressure testing
Replacement cost factors [7]:
- Parts: $400-1,300 (varies by vehicle)
- Labor: $600-1,200 (4-6 hours typical)
- Additional parts: Receiver/drier ($50), expansion valve ($100)
- Refrigerant: $50-150 for complete recharge
- System flush: $100-200 if contaminated
For older vehicles, consider value versus repair cost. Vehicles under warranty may have coverage, reducing costs to labor only. Some choose used compressors ($200-500) for high-mileage vehicles, though reliability varies.

Other System Components Troubleshooting
Beyond major components, several smaller parts can cause AC problems. These often-overlooked items may create symptoms mimicking more serious failures.
Blower Motor Issues
The blower motor pushes air through your vents regardless of temperature. When it fails, you may have cold evaporator coils but no airflow to distribute cooling.
Bad Blower Motor Resistor Symptoms
The blower motor resistor controls fan speeds by varying voltage. When it fails, you lose certain speed settings while others work normally.
Resistor failure symptoms:
- Only high speed works (most common)
- Missing intermediate speeds
- No blower operation at any speed
- Blower runs continuously even with key off
- Burning smell from melted resistor
Resistor replacement costs $50-150 for parts, with 30-60 minutes labor[8]. Located near the blower motor, usually behind the glove box, replacement involves:
- Disconnect battery negative cable
- Remove glove box or lower panel
- Unplug resistor connector
- Remove mounting screws
- Install new resistor with thermal paste
- Test all speed settings
Clogged Expansion Valve Problems
The expansion valve (or orifice tube) regulates refrigerant flow into the evaporator. When clogged with debris or moisture, it restricts flow, preventing cooling.
Expansion valve failure signs:
- Frost on AC lines before valve
- Warm air from vents
- Unusual pressure readings (high on high side, low on low side)
- Intermittent cooling as valve sticks
- Compressor short cycling
Replacement requires system evacuation and costs $200-400 professionally. The valve itself costs $20-100, but labor involves recovering refrigerant, replacing the valve, evacuating moisture, and recharging.
Blend Door Actuator and Faulty Thermostat
The blend door directs air through or around the heater core, controlling temperature. A stuck blend door makes AC blow hot regardless of refrigerant levels.
Blend door problems:
- Clicking noises under dashboard
- Temperature stuck on hot or cold
- Different temperatures from various vents
- No temperature change when adjusting controls
Testing involves:
- Set temperature to coldest
- Feel air temperature at vents
- Adjust to hottest setting
- Temperature should change within 30 seconds
- No change indicates stuck door
Actuator replacement costs $100-300 for parts, with labor varying greatly by vehicle accessibility. Some require dashboard removal (6+ hours), while others allow access through glove box (1 hour).
Vacuum Pump AC System Issues
While not common in modern vehicles, some older systems use vacuum-operated controls. Vacuum leaks prevent proper operation of blend doors and mode selections.
Vacuum system problems:
- Defrost-only operation (default safety mode)
- Cannot change vent modes
- Hissing sounds under dash
- AC works only during acceleration
Check vacuum lines for cracks, especially at connection points. A hand vacuum pump ($30) tests actuators and identifies leaks. Replacement vacuum lines cost pennies per foot, making this an economical repair when identified correctly.
When to Seek Professional AC Inspection
While many AC issues yield to DIY repair, certain situations require professional expertise and specialized equipment. Knowing when to seek help prevents costly mistakes and ensures proper repairs.
Mechanic for Car AC Complex Issues
Professional technicians possess diagnostic equipment and expertise unavailable to most DIYers. They handle refrigerant safely and legally, with proper recovery and recycling equipment.
Situations requiring professional help:
- Compressor replacement needs complete system service
- Evaporator core replacement requires dashboard removal
- Refrigerant type conversion (R-12 to R-134a)
- Warranty repairs must be documented properly
- Unknown refrigerant contamination requires identification
- Multiple component failures suggesting systemic issues
Autvex recommends professional service when DIY attempts don’t restore cooling within two tries, preventing additional damage from continued troubleshooting.
Professional AC Inspection Benefits
Certified technicians provide comprehensive system evaluation beyond simple refrigerant checks. Their diagnostic process identifies current and potential problems.
Professional inspection includes:
- Electronic leak detection finding micro-leaks
- Pressure testing at multiple temperatures
- Electrical diagnosis with factory scan tools
- Performance testing measuring actual cooling capacity
- Component inspection for wear and damage
- System contamination checking for moisture or debris
Many shops offer free or low-cost inspections ($50-100), crediting the fee toward repairs. This investment prevents misdiagnosis and unnecessary parts replacement.
Car AC Repair Costs Overview
Understanding typical repair costs helps budget and evaluate repair versus replacement decisions. Prices vary by region and vehicle type, with luxury vehicles commanding premium rates[7].
Average AC repair costs (2025):
| Service | Parts Cost | Labor Cost | Total Cost |
|---|---|---|---|
| AC Recharge | $50-100 | $100-150 | $150-250 |
| Leak Repair | $50-200 | $150-300 | $200-500 |
| Compressor Replace | $400-1,300 | $600-1,200 | $1,000-2,500 |
| Condenser Replace | $200-400 | $300-500 | $500-900 |
| Evaporator Replace | $400-700 | $800-1,500 | $1,200-2,200 |
| Blower Motor | $150-300 | $100-200 | $250-500 |
Warranty coverage significantly reduces costs. Extended warranties often cover AC repairs after manufacturer coverage expires. For vehicle comparison and reliability, review comprehensive buying guides.
Car AC Maintenance Best Practices
Preventive maintenance extends AC system life and prevents costly repairs. Regular service identifies problems early when repairs remain economical.
Regular AC Service Schedule
Following a maintenance schedule prevents most AC failures. Professional service every 2 years or 30,000 miles maintains optimal performance[8].
Annual AC maintenance tasks:
- Run AC monthly year-round for 10 minutes
- Check cabin filter every 12,000 miles
- Clean condenser during spring
- Inspect belt tension and condition
- Test cooling performance before summer
Biennial professional service:
- Recover and measure refrigerant quantity
- Vacuum test for leaks
- Replace receiver/drier if moisture present
- Add correct refrigerant amount with dye
- Performance test and document results
This service costs $100-200 but prevents major component failures costing thousands.
Preventive Car AC Maintenance Tips
Simple habits significantly extend AC component life. These practices cost nothing but save substantial repair expenses.
Daily maintenance habits:
- Start with windows down to expel hot air
- Run AC on recirculate in traffic for efficiency
- Gradually adjust temperature to reduce strain
- Park in shade when possible
- Use sunshades to reduce interior temperature
Seasonal maintenance:
Spring:
- Clean condenser of winter debris
- Check cabin filter condition
- Test cooling performance
- Inspect belts and hoses
Summer:
- Monitor cooling efficiency
- Clean condenser monthly
- Check refrigerant level if cooling decreases
Fall:
- Run AC during defroster use
- Clear leaves from cowl area
- Service before winter storage
Winter:
- Run AC monthly to circulate oil
- Use defroster setting (runs compressor)
- Keep snow/ice clear of condenser
According to Autvex maintenance data, vehicles following these practices average 40% fewer AC repairs over their lifetime. For comprehensive maintenance schedules, consult professional inspection guides.

Key Takeaway
To fix car AC blowing hot air, begin with simple DIY solutions: replace dirty cabin air filters that restrict airflow, clean debris-blocked condensers preventing heat dissipation, and check for blown fuses costing just $2 to replace. Progress to intermediate repairs like using DIY recharge kits ($30-50) if refrigerant is low, but seek professional help for complex issues like compressor replacement ($1,000-2,500) or persistent electrical problems requiring specialized diagnostic tools[7].
Next Steps
Start troubleshooting by checking your cabin air filter and condenser for blockages—these free inspections often reveal simple fixes. If basic solutions fail, purchase a refrigerant gauge to check system pressure before attempting a recharge, ensuring you actually need refrigerant rather than masking other problems. Schedule professional inspection if DIY attempts don’t restore cooling after two tries, or if you hear unusual compressor noises, see oil residue indicating leaks, or notice electrical issues beyond simple fuse replacement.
FAQs
Why is my car AC blowing hot air?
Common causes include low refrigerant levels from leaks, dirty cabin filters restricting airflow, clogged condensers preventing heat dissipation, blown fuses, faulty compressors, or electrical problems[1]. Start with simple visual checks of filters and fuses before assuming expensive component failures.
What is the most common reason a car AC blows hot air?
Low refrigerant levels due to gradual leaks represent over 50% of AC failures, followed by electrical issues like blown fuses (25%) and dirty cabin air filters restricting airflow (15%)[5]. These three issues account for most AC problems.
What to check first if car AC is not cold?
First verify the cabin air filter isn’t clogged, then inspect the condenser for debris blockage, check fuses in the fuse box, and confirm the compressor clutch engages when AC is turned on[2]. These quick checks identify most common problems.
Can a dirty cabin filter cause AC to blow hot air?
Yes, a severely clogged cabin air filter restricts airflow by up to 60%, preventing proper air circulation through the evaporator coil and making the AC ineffective despite functioning refrigerant systems[3]. Replace filters every 12,000-15,000 miles.
What are the signs of a bad AC compressor in a car?
Signs include AC only blowing warm air, loud clunking or grinding noises from the compressor, clutch not engaging when AC is on, visible oil leaks around the compressor, and excessive cycling on and off[7].
Can you fix a car AC that blows hot air yourself?
Yes, many issues like replacing dirty filters, cleaning condensers, replacing blown fuses, and recharging low refrigerant can be fixed DIY with basic tools and $30-50 recharge kits[5]. Complex repairs require professional service.
Why is my car AC blowing warm air when the fan is on?
This typically indicates refrigerant system failure from low levels, compressor problems, or electrical issues preventing the cooling cycle while the blower motor continues working normally[4]. The fan only moves air; refrigerant provides cooling.
Why is my car AC blowing hot air intermittently?
Intermittent hot air suggests electrical issues like failing relays, a compressor clutch beginning to fail, low refrigerant causing system cycling, or a faulty thermostat control sending incorrect signals[6]. Pattern observation helps identify the cause.
References
- AutoZone. (2024). Why Is My Car AC Blowing Hot Air? Here’s How to Fix It. Retrieved from https://www.autozone.com/diy/climate-control/car-ac-blowing-hot-air
- BeMac. (2024). 6 Issues Causing Your Car’s AC To Only Blow Hot Air. Retrieved from https://www.bemac.ca/blog/car-ac-blowing-hot-air/
- Tires Plus. (2019). 4 Reasons Your Car A/C May Be Blowing Hot Air. Retrieved from https://www.tiresplus.com/blog/maintenance/4-reasons-your-car-a-c-may-be-blowing-hot-air/
- Toyota. (2023). Troubleshooting Common Car AC Issues. Retrieved from https://www.toyota.com/car-tips/common-car-ac-issues/
- AutoZone. (2024). How to Recharge Your Car’s AC. Retrieved from https://www.autozone.com/diy/climate-control/how-to-recharge-car-ac
- A/C Pro. (2025). A/C Pro Instructions. Retrieved from https://acprocold.com/instructions/
- Consumer Affairs. (2025). Cost of car AC repair. Retrieved from https://www.consumeraffairs.com/automotive/cost-of-car-ac-repair.html
- KBB. (2024). Car A/C Repair Costs. Retrieved from https://www.kbb.com/service-repair-guide/car-ac-repair-costs/

I am a senior automotive analyst at Autvex. Expert vehicle evaluations, in-depth reviews, and objective analysis helping readers make informed automotive decisions with years of industry experience.

